Instant Slideshows
Several years back, I was in a situation where I had promised to create a slideshow for a family member, but did not want to deal with any bloated NLE video software. Somehow, ages before this night, I had heard about a command line tool called “FFmpeg” that could be used to combine and speed up videos. I was intrigued at this recollection, and decided to take a look and see if it was the right tool for the job.
From a quick Google search, I discovered Luke Smith’s treasure trove of FFmpeg tutorial videos. Of particular interest in this case was the video:
I highly recommend this video (as well as Luke’s entire channel) to all interested readers, as this guide will directly expand on the concepts laid out in this video in order to create the ultimate slideshow script!
Starting Point: The image2pipe Trick
At the conclusion of the video, Luke uses the following command to create a slideshow:
|
|
Seems simple, right? WRONG!
Take a look at the screen 43 seconds into the video, what do you notice?
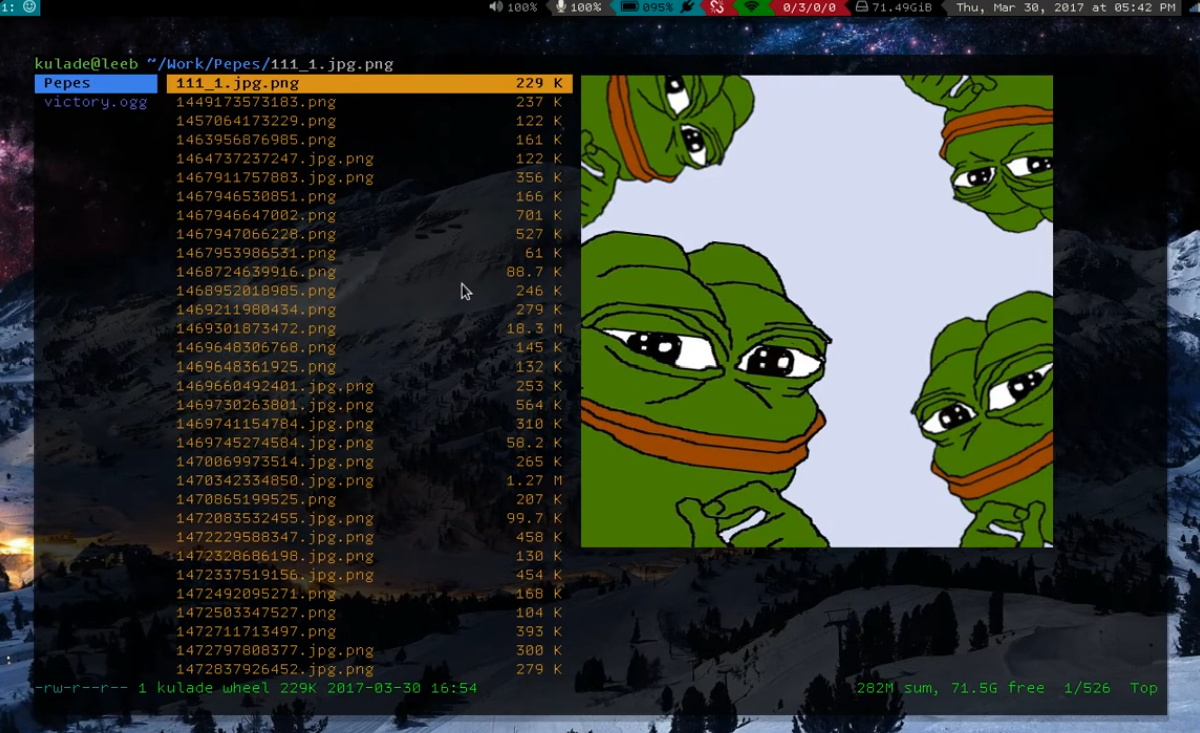
Don’t see it yet? How about now? ENHANCE!

What in the world is a .jpg.png file?
Dear reader, you have been deceived, for in fact, the task at hand is not so simple!
FFmpeg’s image2pipe format struggles to ingest multiple image formats at once, so at the very least we have to make due with converting all images to a common format beforehand like Luke did.
A little inconvenient, but manageable.
What is a far more glaring issue is that image2pipe struggles to handle:
- Varied image formats,
- Resolutions,
- Colorspaces,
- And aspect-ratios,
- As well as incorrect handling of EXIF orientation,
- Insane image stretching,
- And more!
This method is perfectly robust for Luke’s Pepe collection, but a photo slideshow will require superior technique.
Building Towards the Ideal
Okay, so what are we really looking for? Here are some characteristics of my ideal slideshow script, it must:
- Process thousands of images
- Be completely automated (e.g. no manual image conversion)
- Produce consistent results
- Produce a result that is visually appealing
- Have a dead simple architecture
- Avoid a disk cache for intermediate images (the purpose of this stipulation will become clear later on)
To achieve this, let’s work off of and adopt the concept of the original script. We will study its flaws along the way, and improve step-by-step.
Initial Improvements
Let’s concentrate on FFmpeg first. For starters, we should try to be a bit more verbose and use some sensible defaults to optimize the codec for our use case:
|
|
-c:v libx264- This is the default video codec.
An h.264 (AVC) compliant codec should be used here
a.) because of its wide compatibility,
b.) it is sufficient for this use case,
and c.) see
-tune stillimage. -crf 22- A constant rate factor of 22 is likely overkill for this application.
AVC video standards allow a quantization factor (
q) betweenq=0(no compression) toq=51(max compression). A crf value should be specified to ensure a consistent visual quality throughout the movie. Specifying a bitrate, fixed or variable, should be avoided as it is a cumbersome method especially when the video’s resolution, framerate, etc. changes. -preset ultrafast- This is the fastest compression possible, it’s not necessarily ideal, but it will allow our cpu to spend less time thinking and more time doing.
-tune stillimage- This is the killer feature of an AVC codec for this application. It optimizes the compression to account for the fact that our movie will not contain many moving pictures.
More Seconds Per Frame
This example is still configured for Luke’s use case, the pictures move too fast. Let’s make each picture display for 5 seconds at a time:
|
|
Here I changed the framerate from 1.53 to 0.20 (equal to 1/5).
Notice that the -framerate flag precedes the -i flag.
We are settings the framerate of the input, in this case a set of frames, not separate images.
Order of operations matters for FFmpeg when it comes to inputs (especially if using multiple inputs).
However, if you run this command, you will run into another issue. That is, the video will stutter and the seek bar will violently jut to the next frame.
This happens because we specified that the input stream have a framerate of 0.20, or 5 seconds per frame.
By default, FFmpeg will produce an output whose framerate is equal to input framerate.
To fix this, we must specify a video filter and tell FFmpeg to interpolate between the frames:
|
|
-vf "fps=1,framerate=30"vfmeans video filter, and in this case, I am applying 2 filters:fps=1- This forces the output frame spacing basis to be 1 second per frame, rather than x seconds per frame (5 in this case).
This way, when we specify
framerate=30in the next step, the actual framerate of the output will equal 30/1 frames per second rather than 30/x. framerate=30- This filter creates interpolated frames between existing frames.
Since we set
fps=1in the prior step in the chain,framerate=30equates to 30 frames per second regardless of the input framerate. By default, this create interpolated frames by repeating the prior real frame until the next real frame is reached.
Bonus: Free Mix Transitions!
As a bonus, we can use trick the framerate video filter into giving us some basic transitions for FREE!
This is due to the way the framerate filter interpolates between frames when there is a time delta defined between the start and end interpolation times: it just does does an alpha mix by default!
|
|
framerate=30:interp_start=0:interp_end=255:scene=100- As previously mentioned, the
frameratevideo filter creates new interpolated frames between existing frames. The extra optionsinterp_start,interp_end, andscenetell the filter how exactly it ought to actually get froma→b. interp_start=0andinterp_end=255- Within the transition between frame
a→b, FFmpeg defines an 8 bit scale (0-255). In this case, the frames are spaced 1 second apart due to thefps=1filter. E.g.0is equal to 0 seconds,255is equal to 1 second, and128would be equal to 0.5 seconds. So in this case, the transition begins at 0 seconds, and ends at 1 second. The frames being placed at a wide interval is what makes this effect work. scene=100- This just defines the threshold for interpolating between frames.
100is an arbitrary value as far as I’m concerned. It seems to transition between both like and unlike images just fine.
The Pièce De Résistance
At this point, the script still fails majorly at being a slideshow script. That is to say that up to now, we have been polishing a turd.
We have to bite the bullet and admit that there is really no good way of processing these images with FFmpeg. Certain solutions have been proposed, such as:
-vf "scale=1920:1080:force_original_aspect_ratio=decrease,\
     pad=1920:1080:(ow-iw)/2:(oh-ih)/2,\
    ..."
And while this is a big improvement and fixes several of the aforementioned issues inherent to FFmpeg, it still falls short of being the miracle one-size-fits-all solution which would support variable image formats, etc. FFmpeg just isn’t made for image processing.
In reality, we need a way to process the images before they reach FFmpeg, and we can do this with ImageMagick!
ImageMagick is the ideal tool for this because it is made for image processing, unlike FFmpeg. It is extremely unpicky about image formats, can correctly handle EXIF data, and, most importantly, it can output images to a pipe! That is the pièce de résistance, and it is how we are going to craft a script that can elegantly achieve the ideal architecture and functionality.
Magick-ing
Let’s start with a basic magick command:
|
|
This will open the images specified, apply the given filters (remember ImageMagick applies filters in order), and output the results to stdout as raw rgb image data.
Since this is not being saved on a disk, but instead being passed straight to FFmpeg in memory, why waste the cycles it would take to compress the image if it will need to be immediately decompressed once it goes to FFmpeg?
-auto-orient- This handles the EXIF orientation tag and rotates the image before performing any other processing on it. Most phones and cameras nowadays use EXIF data to mark the correct orientation of the image based on how it was taken rather than rotating it in software. Most image viewers handle this seamlessly, so it’s likely that you’ve never noticed this before.
-resize 1920x1080- Resize the image to fit within a 1920x1080 box. This does not crop or stretch the image, but sizes the image such its longest edge should be constrained by the box at the given resolution.
-background black- Does exactly what it says on the tin.
-gravity center- Defines the anchor of the image at its center such that future operations should pad or crop from that point.
-extent 1920x1080- Pad the image to exact dimensions.
In combination with
-background blackand-gravity center, this will create a letterbox unless the image’s aspect-ratio matches exactly. -depth 8- Bit depth per channel, e.g. 24 bit color.
rgb:-- Output a raw RGB pixel stream to stdout.
A Piping Hot Slideshow Script
Let’s put this all together now:
|
|
Instead of ‘cat‘ting’ all those images into FFmpeg, we can now simply ‘magick’ them in instead.
Some changes are necessitated in regards to the input format since there are no longer any actual ‘images’ per-say – at least according to FFmpeg’s perspective.
This is because outputting raw rgb from ImageMagick, as one may expect, literally means that it will solely output pure, raw rgb pixels: e.g.
0xFF0xFF0xFF0xFF0xFF0xFF, etc.
No headers or metadata to speak of.
To handle this, FFmpeg allows specifying the rawvideo format, requiring a -video_size and -pixel_format to boot.
From the resolution and bit depth, it is trivial to calculate where one frame ends and the next begins when dealing with raw rgb.
The -probesize 32 and -analyzeduration 0 disable any stream analysis, e.g. prevent FFmpeg from looking for headers that aren’t going to be there.
The Final Stretch
No, that isn’t a pun about image stretching – we already fixed that!
Instead, we face a much bigger issue: that is the fact that this script WILL eat all your system’s memory and cause a crash within in a matter of seconds. How? Well, ImageMagick has a bad habit of trying to load all images into memory at once when using a glob selector. Instead, it should load one image at a time and then stream the result to the pipe and wait until all data in ingested prior to loading the next image. Unfortunately, that isn’t how ImageMagick is programmed, so the FFmpeg process is stalled until all images are processed (assuming your system does not run out of memory first).
An easy remedy is available, without using a disk cache, by simply allowing the shell to handle streaming instead of ImageMagick.
This can most conveniently be done by wrapping the magick command in a for loop and piping the loop to FFmpeg:
|
|
I enjoy this for loop → pipe trick, I figured it out years ago but never had a real use case for it until now.
This is now the final iteration of the script: ImageMagick will now process one image at a time and stream that data to FFmpeg, who will begin to process the video as ImageMagick prepares the next frame in realtime. This is the most elegant solution I’ve found, and it nicely achieves the goals set out at the start of this article.
Copy-able Script
The up-to-date version of this script can be found in my scripts repo at video/slideshow (raw).